yêu cầu thiết kế lưới điện cho khu vực gồm 1 nguồn và 6 phụ tải được phân

Nghiên cứu thiết kế ,cải tạo, hệ thống điều khiển trạm bơm la tiến
Ngày tải lên :
28/11/2013, 11:05
... dùng vi xử lý 58
4 -15 Sơ ñồ chân vi mạch H11L1QT. 59
4 - 16 Giản ñồ thời gian kích mở cho các Thyristor với góc mở αmin = 30
0
63
4 -17 Tạo xung chùm có ñộ rộng 18 0
0
64
4- 18 Khuyếch ñại xung ... góc mở van 45
4 -10 ðặc tính cơ khi ñiều chỉnh ñiện áp 47
4 -11 ðặc tính khởi ñộng U
ñk
(t) 49
4 -12 Sơ ñồ chân dsPIC30F4 011 54
4 -13 Cấu trúc bên trong của dsPIC30F4 011 55
4 -14 Sơ ñồ khối bộ ... hầm
13
2.3 .6 Bơm nước cứu hoả 13
2.4 Các tủ ñiện của trạm 14
2.4 .1 Tủ phân phối 14
2.4.2 Tủ ñộng lực (tủ khởi ñộng TðK) 14
Chương 3 CÁC PHƯƠNG PHÁP KHỞI ðỘNG ðỘNG CƠ KHÔNG
ðỒNG BỘ 15
3.1...
- 105
- 805
- 0


Tài liệu Các Mẫu Thiết Kế Toàn tập part đầu pptx
Ngày tải lên :
15/12/2013, 02:15
... rễ để nó
tự nhiên nhất có thể
Step 10 - Drawing the Clouds:
Tạo một layer mới
Vẽ lên một số chấm brush
mềmcó kích cõe 300px và đătk
opaccitu là 10 >20 %
Optional:
Cuối cùng thêm ... thì tùy bạn .
Step 6 - Patching the Grasses:
Trên layer cỏ Cỏ các banj đặt
Opacity to 50%.
Chọn Edit > Transform > Distort
and transform the và quay sao cho
cỏ phut hết các lớp ...
dùng công cụ kéo dãn smudge
tool để tạo các rìa ngoài cho tự
nhiên
Step 8 – rễ cây
Lấy một số cọng rễ bõ vào layer
chính sao cho nó tự nhiên là được
Step 3 - Forming the Base:
Ctrl...
- 4
- 385
- 0

Tài liệu Các Mẫu Thiết Kế Toàn tập part 1 pdf
Ngày tải lên :
15/12/2013, 02:15
... Select / Feather: 50 or 60 px then press Delete a few times
Open a desk lamp picture and cut it out of background
Use Single pixel Rectangle Marquee tool to make 1 line like this:
...
Create a new layer mask, gradient from white to black, adjust 10 ,20% and apply this step
to P layer too
Adjust Opacity 10 , 20% and use Blur tool to make opaque sides of selection
... Levels:
And this is my final result:
The result of this step:
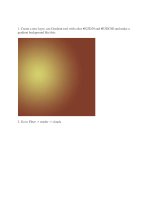
Create a new document 60 0x450px, apply Radial Gradient like the picture below:
Create a rectangle selection and...
- 21
- 365
- 0

Tài liệu Các Mẫu Thiết Kế Toàn tập part 2 pdf
Ngày tải lên :
15/12/2013, 02:15
... Preset, enter the brush name, for
example, Flower _1 and press Ok to save it, then it will show up in your brushes. Create a
new document sized 10 00×500 pixels with all the default settings, RGB, ... the button ‘Toggle the
Brushes palette’ on the Options Bar to open brush presets window or by choosing
Window > Brushes. Here we can see a couple of presets. I would like to briefly review ... again and save this brush as Flower_2. Create a
new one document and make new brush prints:
Chose Texture action. Here you can set different parameters affecting the application of
texture...
- 9
- 388
- 0

Tài liệu Các Mẫu Thiết Kế Toàn tập part 4 pdf
Ngày tải lên :
24/12/2013, 10:18
... layer must be situated lower than the layer
containing the indicator itself. Choose for this operation the color # 011 509
Blending Options>Inner Glow
Blending Options>Stroke ... this tutorial how to design awesome Yin Yang wallpaper.
Create a new file (File>New) with 12 80x1024px and 72dpi. The Background and
Foreground colors should be adjusted the way from below:...
- 11
- 345
- 0

Tài liệu Các Mẫu Thiết Kế Toàn tập part 5 ppt
Ngày tải lên :
24/12/2013, 10:18
...
Creat a new document (Ctrl+N)
Size at 800x600px or 10 24x 768 px that suitable for your monitor.
Pick Gradient Tool
Choose this gradient from the Gradient Editor
If you ... Photoshop : AK_VectorPeople
I choose this one :
Creat a new layer on the top, brush in the middle :
Fill this selection with color #12 a80d
Continue making creat new ... Tree_brush
STEP 2:
Download and load this brush into your photoshop : Land_brush
Choose any "island" inside this brush set that you like :
You've already finished...
- 11
- 417
- 0

Tài liệu Các Mẫu Thiết Kế Toàn tập part 6 ppt
Ngày tải lên :
24/12/2013, 10:18
... AK_VectorPeople
Creat a new document (Ctrl+N)
Size at 800x600px or 10 24x 768 px that suitable for your monitor.
Pick Gradient Tool
Choose this gradient from the Gradient Editor
If you ... selection :
STEP 2:
Download and load this brush into your photoshop : Land_brush
Choose any "island" inside this brush set that you like :
Result :
STEP ...
Fill this selection with color #12 a80d
Continue making creat new layer and fill selection like this :
You've...
- 11
- 342
- 0
Tài liệu Các Mẫu Thiết Kế Toàn tập part 7 doc
Ngày tải lên :
24/12/2013, 10:18
... a new file (File>New) of 12 80x1024 px and 72 dpi, which must be painted in
#F9C559 with the Paint Bucket Tool (G).
Next we’ll create another file of 14 0x140 px and 500 dpi on which ... For the last obtained layer we have to choose the next demonstrated
parameters: Opacity 81% , Blending mode-Overlay
The layer’s parameters: Fill 60 %
Blending mode-Darker Color
... panel).
On the next new layer (Create new layer) we’ll choose again the Brush Tool (B) to
draw a diagonal line, which color is #821F 06
Next we’ll represent a lot of musical notes,...
- 17
- 285
- 0
Tài liệu Các Mẫu Thiết Kế Toàn tập part 8 doc
Ngày tải lên :
24/12/2013, 10:18
...
lên trên cái nút chỉnh opacti cho hợp lý để có được độ bóng như trên hình.
•
Chọn Window > Styles.
•
Thiêt lập các hiệu ứng sau.
•
Làm biểu tượng cho nút Preset shapes .
Ta có ... Overlay mà bạn thích ví dụ như mình chọn cái này
•
Tạo một vùng chọn hình bán nguyệt sao cho nó như tạo độ bóng cho cái màn hình
băng gương của điện thoại
•
Dellete vùng đó di .
... cả lại ctrl+ship+E
Thêm thắt một chút nữa ta sẽ được như thế này
•
Tạo hiêu ứng shadow cho cái bóng sáng và chinh opactuty 35%
•
Chọn Filter > Blur > Gaussian Blur (25).
•...
- 29
- 294
- 0
Tài liệu Các Mẫu Thiết Kế Toàn tập part 9 ppt
Ngày tải lên :
24/12/2013, 10:18
...
http://www.sxc.hu/photo /10 20 017
http://www.sxc.hu/photo/ 315 179
http://www.sxc.hu/photo/233279
http://www.sxc.hu/photo /18 7500
http://www.sxc.hu/photo /64 8 267
http://www.sxc.hu/photo/4 862 77
http://www.sxc.hu/photo/80 517 4 ...
http://rapidshare.com/files /14 65 7 219 5/ngua_sat_.psd.html
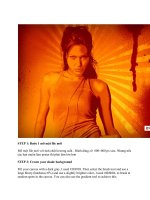
Bước 13 : các bạn dùng côg cụ Smude Tool và làm mờ đi những vùng khôg cần thiết như
hình dưới nè , đến bước này là dễ rùi nà
Bước 14 : bước này ... [TUT]Cảm nhận sự khác biệt giữa ngựa thật và ngựa máy - 09 -19 -2008,
06: 56 PM
Bước 1:
Điều đầu tiên bạn cần làm là tìm một số lượng lớn ảnh để bắt đầu thiết kế.Trong...
- 17
- 333
- 0
Tài liệu Các Mẫu Thiết Kế part 10 doc
Ngày tải lên :
24/12/2013, 10:18
... menu bar, choose Layer style and do as the picture below:
Drop sadow: color #4F372C
11 . Color Overlay
12 . Pattern Overlay: click in the small box beside the pattern and choose rock ... pattern and choose rock pattern,
you can choose any pattern that you like, click OK
5. Inter Shadow: color #4F372C
6. Outer Glow: color #ECD12D
Another result
Pick a ...
Duplicate layer ellipse and put it on butterfly layer then set opacity 32% and flow 50%
1. Create a new layer, use Gradient tool with color #823D29 and #E3DC8D and make a
gradient background...
- 12
- 340
- 0
Tài liệu Các Mẫu Thiết Kế part 11 docx
Ngày tải lên :
24/12/2013, 10:18
... sau :
http://i140.photobucket.com/albums/r 31/ daoanhdung/tut2/3.jpg
4. Dùng Pen làm tương tự để có những vùng mây chồng lên nhau, màu tô như hình sau
(Chú ý, mỗi vùng mây là 1 layer mới) : ... ta có :
Người đăng: Duongminhhien
Gửi ngày 8 Tháng 2, 2007
In Gửi mail
1. Mở 1 file mới kích thước khỏang 500 x 63 0 pixels, quét gradient như hình sau :
ta có
5. Dùng Pen vẽ ở ...
6. Mở Shape Tools, chọn Shape như hình sau (nếu ko có shape này bạn vào Shape, load
file All trong...
- 11
- 279
- 0

Tài liệu Các Mẫu Thiết Kế Toàn tập part 12 pptx
Ngày tải lên :
24/12/2013, 10:18
... được ki quan màu vàng
STEP1:
Tạo một file mới và fill vào màu #000000.
Vào Filter -> Noise -> Add Noise
giá trị là amount 14 % và đánh dấu vào Gaussian and Monochromatic ... -> Brightness/Contrast and set option:
Bước 2 mỡ 1 file anh ki quan ra
Tương tự ta làm với 2 ki quan trên và…sau khi 1 chut sắp đặt và thêm text cùng với
brush ta được hình sau...
- 11
- 322
- 0

Tài liệu Các Mẫu Thiết Kế Toàn tập part pptx
Ngày tải lên :
21/01/2014, 16:20
...
hehe
Step 1 :
800x80
0
okie
Step 2 :
Ctrl+sh
i
chỉ cốt
y
Step 3 :
m
ới lại viết
chúng ta
m
0
,
chọn công
i
ft+N
t
ạo 1
y
ếu là để ta
Các bạn th
i
tut , viết tu
t
m
ở 1 tài liệu ... layer mà
t
ó
để tạo vù
n
để hiệu ch
ỉ
y
cho nó k
h
c
ity cho nó
k
v
ertical để l
ộ
x
bạn chọn
m
o
nó méo đ
i
t
a thực hiệ
n
n
g lựa chọ
n
ỉ
nh nó cho
h
oảng 45%
k
hoảng 75
%
ộ
n ngược ... d
Step 6 :
"75%" l
ạ
ở trên g
i
dc kết q
u
các bạn gi
ữ
t
màu
t
ừ "
w
nó lên phí
a
r
vừa tạo C
layer " 45
%
h
ọn layer "
4
ưới chọ
n
okie trông
k
ạ
i làm 1 ch
ọ
i
ãn...
- 10
- 366
- 0

Tài liệu Các Mẫu Thiết Kế Toàn tập part 13 doc
Ngày tải lên :
21/01/2014, 16:20
... thấy trên cùng là Layer 1, kế tiếp là Trang copy và Trang.
8. Tao New Layer, cái này sẽ nằm dưới Layer 1 và trên layer Trang copy.
Tương tự
Mang layer 1 lên trên layer Trang này. ... Blur > Gaussian Blur, chọn 10 pixels. Cái này là tuỳ bạn.
6. Nhân đôi layer Trang, Filter > Blur > Motion Blur, cái này cũng tuỳ bạn nhé để chọn
Angle cho phù hợp. Tham khảo FF chọn ... thành một layer. Ở đây, FF thêm cái râu nữa, đây là
kết quả:
4. Tên nó là layer 1, bạn doublicate layer 1 và đặt một cái tên. FF đặt tên là Trang. Ctrl +
click vào ô vuông nhỏ của layer trắng...
- 17
- 374
- 0


Tìm thêm:
- hệ việt nam nhật bản và sức hấp dẫn của tiếng nhật tại việt nam
- xác định các mục tiêu của chương trình
- xác định các nguyên tắc biên soạn
- khảo sát các chuẩn giảng dạy tiếng nhật từ góc độ lí thuyết và thực tiễn
- khảo sát chương trình đào tạo của các đơn vị đào tạo tại nhật bản
- khảo sát chương trình đào tạo gắn với các giáo trình cụ thể
- xác định thời lượng học về mặt lí thuyết và thực tế
- tiến hành xây dựng chương trình đào tạo dành cho đối tượng không chuyên ngữ tại việt nam
- điều tra đối với đối tượng giảng viên và đối tượng quản lí
- điều tra với đối tượng sinh viên học tiếng nhật không chuyên ngữ1
- khảo sát thực tế giảng dạy tiếng nhật không chuyên ngữ tại việt nam
- khảo sát các chương trình đào tạo theo những bộ giáo trình tiêu biểu
- nội dung cụ thể cho từng kĩ năng ở từng cấp độ
- xác định mức độ đáp ứng về văn hoá và chuyên môn trong ct
- phát huy những thành tựu công nghệ mới nhất được áp dụng vào công tác dạy và học ngoại ngữ
- mở máy động cơ lồng sóc
- mở máy động cơ rôto dây quấn
- các đặc tính của động cơ điện không đồng bộ
- hệ số công suất cosp fi p2
- đặc tuyến hiệu suất h fi p2